
How to Fix Flickering Lights: Safe Checks First
You're cooking dinner, the air conditioner kicks on, and the kitchen lights dip. Later the bedroom light stutters only when you dim it. It's tempting to buy another bulb and hope, but that guess often hides the underlying cause. Learning how to fix flickering lights starts with reading the pattern first, because one fixture, one circuit, and a whole home point to very different problems.
Table of Contents
Match Your Flicker Pattern to Its Likely Cause - What the Pattern Rules In or Out - The Whole-Home Warning
How to Run Safe Checks Before Replacing Anything - The Seven Checks in Order - What a Healthy Result Looks Like
Fixing Flicker in LED Fixtures and Dimmers - Read the Labels Before You Buy Anything - Verify Across the Whole Range
Keep a Pattern Log and Stop Masking Faults - Log It Instead of Guessing - Mistakes That Hide the Real Fault
Decide When to Stop and Call an Electrician - The One Decision Rule - Signs That End the DIY Route - What Happens During the Visit
Match Your Flicker Pattern to Its Likely Cause
Your flicker pattern tells you where to look before you touch a bulb, a switch, or a breaker.
Flicker pattern | Likely cause | First check | Call an electrician if |
|---|---|---|---|
One fixture, LED bulb on a dimmer | Dimmer and LED driver mismatch | Swap in a bulb listed for that dimmer | Flicker continues with a compatible bulb |
One fixture, bulb feels loose or socket is worn | Loose lamp or socket contact | Power off, reseat bulb, look for browning | Socket is warm, discolored or smells of burning |
Several fixtures on one circuit flicker together | Loose connection or overloaded branch circuit | Note which appliances run at the same time | Flicker is daily, or outlets feel warm |
Lights dim when a large appliance starts | Voltage drop from a high load or loose neutral | Log the appliance (AC, dryer, EV charger) | Dimming reaches several rooms |
Whole home flickers, worse in wind or storms | Service connection or utility supply problem | Record weather and timing; do not open the panel | Always, call an electrician and your utility |
Flicker visible only on video or screens | High-frequency LED modulation | Test with a different lamp of known quality | Flicker persists after a lamp change |
What the Pattern Rules In or Out
A single fixture usually means something local, such as a loose bulb, a worn socket contact, a failing LED driver, or a dimmer that doesn't match the lamp. That's the only pattern where reseating or replacing a bulb is a reasonable first test.
When several fixtures on the same circuit flicker together, a bulb can't explain it. You're looking at a loose connection somewhere on that branch circuit or more load than the circuit handles well. Lights that dip each time a dryer, air conditioner, or EV charger starts point the same way, toward voltage drop under heavy load or a connection that struggles when current rises.
The Whole-Home Warning
Whole-home flicker is a different category entirely. The U.S. Consumer Product Safety Commission wiring hazard guide identifies flickering household lights and changes in television-picture size when wind blows as possible signs of poor contacts at the service-entrance cable or service drop. The same guide estimated roughly 46,000 fires involving home electrical distribution systems occurred annually, causing about 440 deaths, 1,420 injuries, and $434 million in property losses.
A poor service contact creates resistance, heat, voltage variation, and arcing. You can't fix that with a better bulb, and you shouldn't try to tighten service conductors yourself.
Write down which fixture and room flickers and exactly when it happens. That short note decides whether you're testing a bulb or stopping for professional help.
If flicker spans multiple rooms, follows large appliances, or comes with buzzing, burning odors, warm outlets, or discoloration, don't keep swapping bulbs. Turn off the affected circuit if it's safe to do so and get the connections, panel, and service conductors inspected.
How to Run Safe Checks Before Replacing Anything
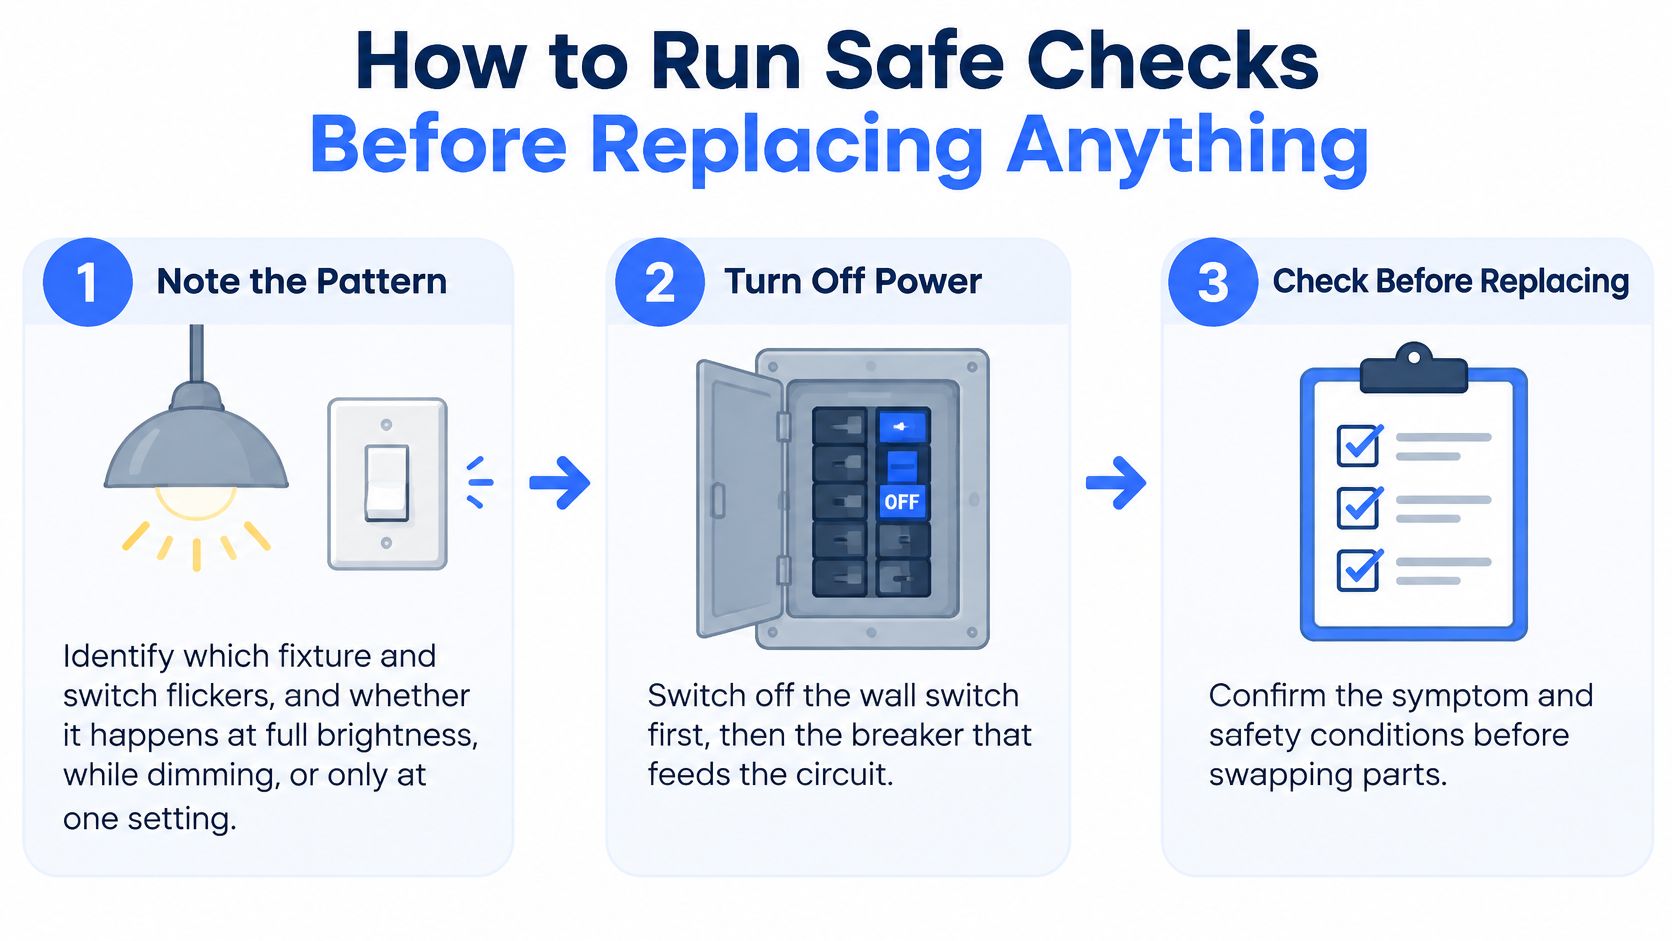
These checks cost nothing, and they separate a bad bulb from a bad circuit, which is the decision that matters.
The Seven Checks in Order
Note the pattern first. Record which fixture and switch flickers, and whether it happens at full brightness, while dimming, or only at one setting. That detail later tells you if you're chasing a dimmer problem or a wiring problem.
Turn off the wall switch, then the breaker. A wall switch alone doesn't isolate the wiring, and some switches are wired in ways you can't predict. The common slip is trusting a switch you've never tested, so kill the breaker that feeds the fixture before you touch anything.
Inspect with power off and the bulb cool. Remove the bulb and look at its base, the socket, and the fixture for browning, cracks, melted plastic, or a burnt smell. Any of those means heat has already done damage, and reseating won't undo it.
Confirm the bulb matches the fixture. Check the voltage and base type printed on the bulb against the fixture label, then reseat it firmly by hand. Don't force it, because a cross-threaded or overtightened bulb can crack a worn socket.
Restore power and test the full range. Turn the breaker back on and run the light at full brightness, then at the lowest dimmer setting if you have one. Many faults hide at full power and only show up dimmed.
Swap in a known-good bulb. Use a bulb you know works steadily in another fixture. If the flicker stops, the old bulb was the cause. If it continues, the bulb is cleared and the fixture, switch, or circuit is now your suspect.
Check a second fixture on the same breaker. Turn on another light fed by that breaker and watch both. If several flicker together, you're dealing with the circuit, not the bulb, and further bulb swaps waste money.
What a Healthy Result Looks Like
A pass is boring, and boring is good. You want steady light at every setting, no buzzing from the switch or fixture, and no warmth at the switch plate after the light has run a few minutes. Each of those three signs maps to a different failure. Flicker at one dimmer setting points at the control, buzzing points at a contact arcing under load, and warmth at the plate points at a connection wasting energy as heat.
Stop signal: Sparks, a burning smell, or heat at the switch means leave the breaker off. Don't restore power to test again just to be sure.
Run these checks in order because they take minutes and they prevent the most common mistake, replacing parts before you've proven which part failed. Steps 6 and 7 do the diagnostic work. If a known-good bulb still flickers, the bulb is innocent. If a second fixture on the same breaker flickers too, the problem lives on the circuit, and no new bulb will fix it. At that point the wiring question overrides the bulb question, and you've already narrowed the fault to the fixture, the switch, or the branch itself.
One more habit pays off. Test during the conditions that trigger the flicker, such as running the appliance that usually causes the dip, rather than testing only when the house is quiet. A fault that appears under load won't show itself in an unloaded test. Write down the result either way before you change anything else, so each check gives you a clean answer instead of a guess you have to repeat.
Fixing Flicker in LED Fixtures and Dimmers
Most dimmed LED flicker isn't a defective bulb. It's a dimmer that was never built for LEDs trying to control a driver it doesn't understand.
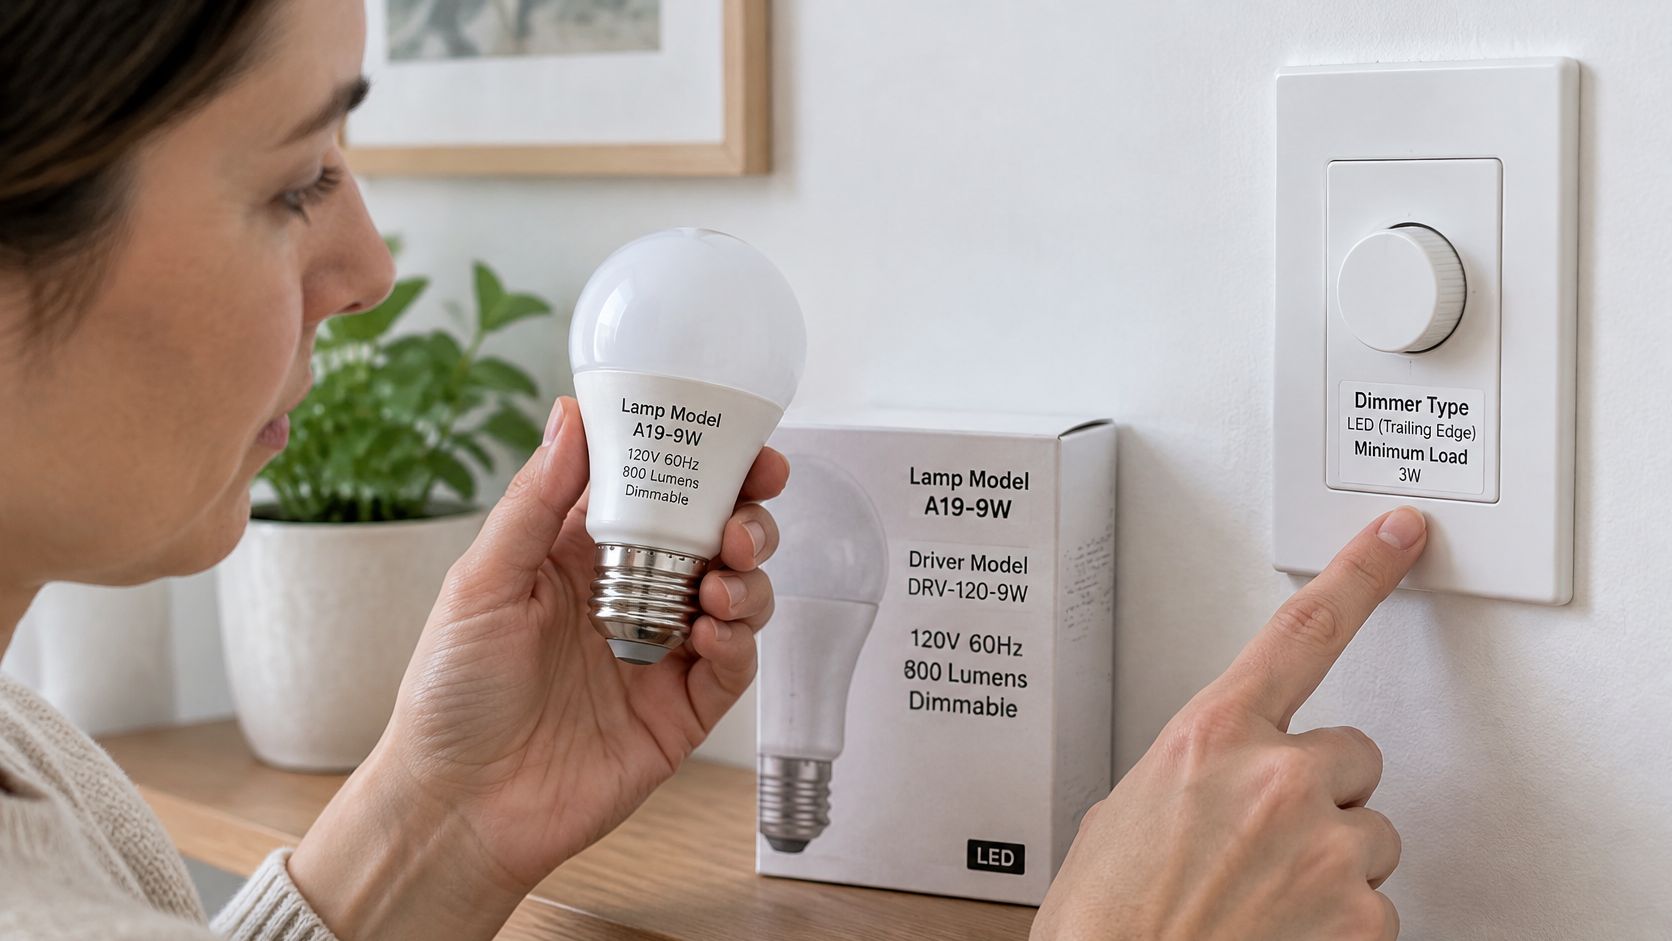
Check the physical setup in the photo below before you assume the lamp itself has failed.
Read the Labels Before You Buy Anything
Pull the lamp or driver model, the dimmer type, and any minimum-load rating from the packaging or the dimmer itself. An older incandescent-era dimmer often can't run LEDs cleanly, and a single low-watt LED can sit below a dimmer's minimum load, so it stutters, drops out, or won't start at low settings.
Work out which control method you have, forward-phase, reverse-phase, or 0 to 10 V, because mixing unverified controls and drivers produces poor dimming even when each part works on its own. The U.S. Department of Energy flicker guidance recommends obtaining percent flicker and PWM frequency from the manufacturer when the system is dimmed, and summarizes a recommendation to keep percent flicker below 5% at frequencies below 90 Hz to reduce seizure risk. A steady look doesn't prove quality, since high-frequency modulation can be invisible yet measurable.
Smart switches add settings that mimic hardware faults. Check the minimum dimming level and dimming curve in the app or on the device before replacing parts, because raising the low-end trim sometimes ends low-level flicker without new hardware.
Watch the walkthrough below, then run the same full-range test on your own fixture.
Verify Across the Whole Range
Test at startup, minimum, mid-range, and full output. A fixture that's rock steady at 100% can still flicker badly at 20%, and that's where mismatched pairs usually fail. The fix is a matched pair, either an LED-rated dimmer for your lamps or a lamp and driver the dimmer maker lists as compatible, confirmed by testing rather than by the box artwork.
If you're planning new fixtures anyway, checking recessed lighting installation cost helps you budget for compatible drivers and controls up front instead of retrofitting them later. Don't mix driver families on one dimmer, and don't judge success at full brightness alone.
Keep a Pattern Log and Stop Masking Faults
Replacing bulb after bulb until one seems to work is the habit that does the most harm. Each swap that temporarily steadies the light can mask a loose connection or an overloaded circuit, and the fault keeps heating the wiring while you think you've solved it.
Log It Instead of Guessing
Keep a short note on your phone. Five fields cover almost every diagnostic question an electrician will ask.
Date and time: Shows whether flicker clusters at certain hours or utility events.
Fixture, room, and dimmer setting: Separates a local fault from a circuit fault.
Appliances running: Names the dryer, AC, space heater, or charger that was on.
Weather: Wind or storms point toward the service connection, not the bulb.
Bulb swap result: Records whether flicker followed the bulb to another fixture.
Photograph the breaker labels from outside the panel so you can name the circuit accurately. You get the information without opening anything energized.
Mistakes That Hide the Real Fault
Buying the cheapest LED driver: It may flicker on a healthy circuit and send you chasing wiring that isn't faulty.
Using a dimmer on the wrong load: The pair stutters, you blame the lamp, and the mismatch survives every bulb change.
Resetting a breaker repeatedly: A tripping breaker is reporting a problem, not asking for persistence.
Running a space heater from an extension cord: You avoid the overloaded circuit instead of fixing it, and add a new heat risk.
Tightening anything in service equipment: That work sits beyond a breaker you can switch off, so it isn't a homeowner task.
Change one thing at a time so each test has a clear result, then bring the log with you. Two days of honest notes usually beat a shelf of spare bulbs.
Decide When to Stop and Call an Electrician
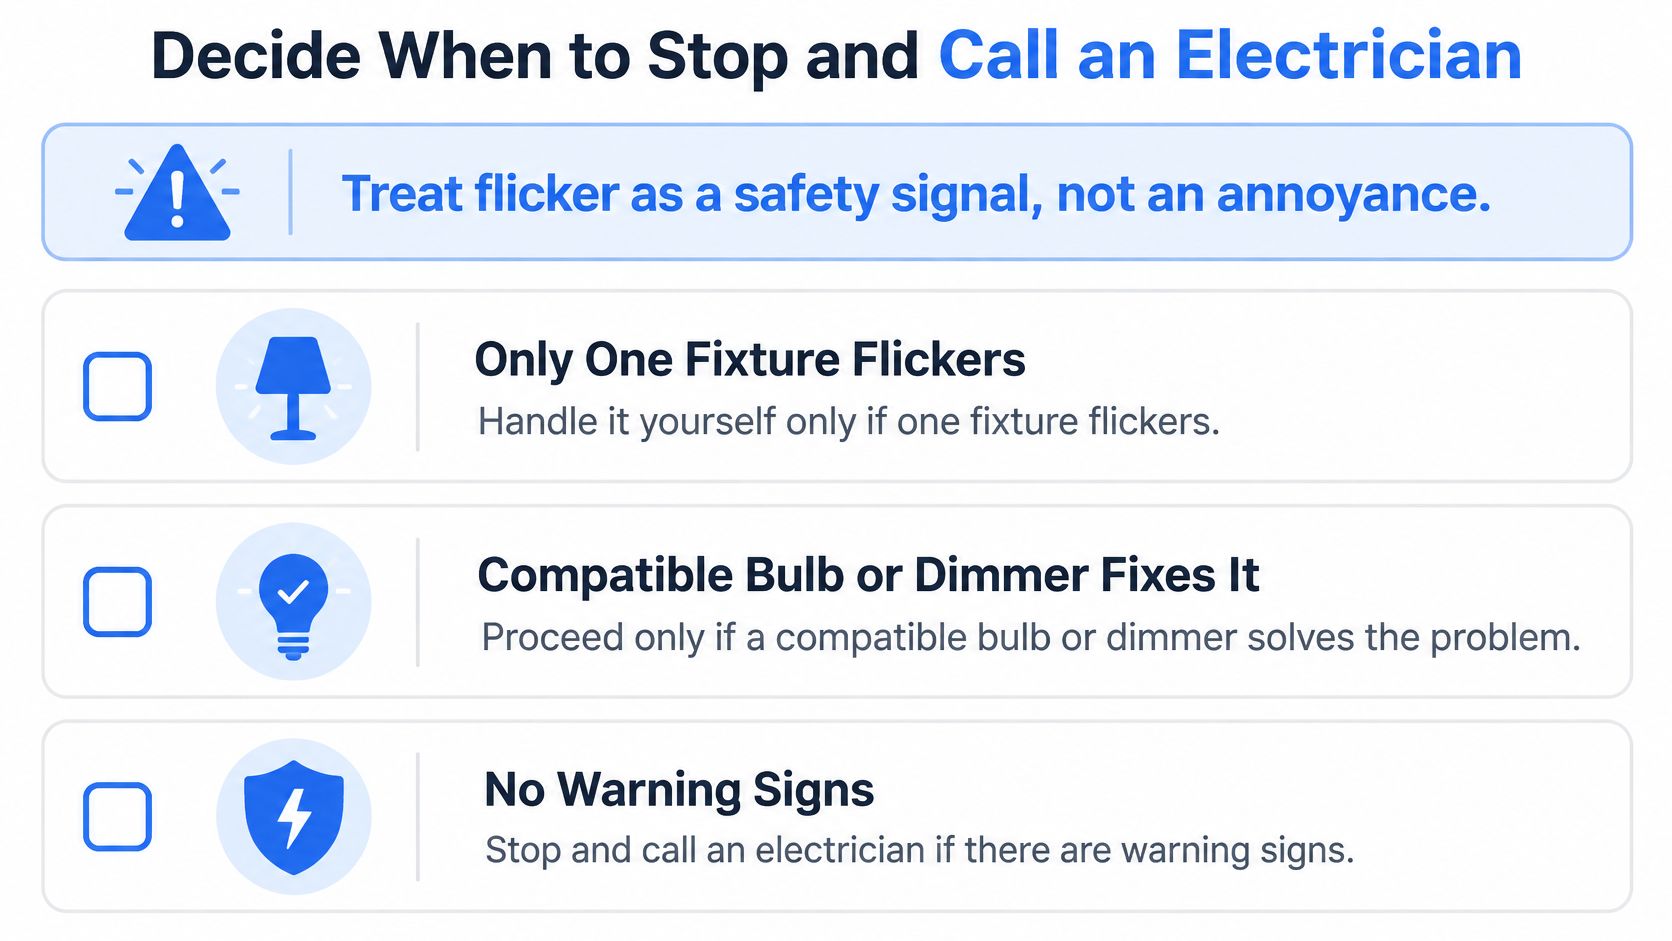
Treat flicker as a safety signal, not an annoyance you live with until it gets worse.
The One Decision Rule
Handle it yourself only when all three are true. Only one fixture flickers. A compatible bulb or dimmer fixes it across the full range. No warning sign appears at any point.
If any one of those fails, stop. That rule is strict on purpose, because the faults outside it live in connections, panels, and service equipment you shouldn't open.
Signs That End the DIY Route
Call a licensed electrician if flicker comes with any of the following.
Buzzing, sparks, or a burning smell: These point to arcing or overheating contacts.
Warm or discolored outlets or switch plates: Heat at a device means resistance where there shouldn't be any.
A breaker that trips repeatedly: The protection is doing its job and telling you something's wrong.
Several rooms flickering at once: The fault sits upstream of any single fixture.
Flicker that follows weather or appliance starts: Wind-related or load-related symptoms suggest service or neutral problems.
An older home or a rental: Aging wiring raises the stakes, and tenants shouldn't modify a landlord's electrical system.
The stakes justify the caution. The National Fire Protection Association home electrical fires report estimates U.S. fire departments responded to an annual average of 46,652 home electrical structure fires during 2020 to 2024, causing approximately 527 civilian deaths, 1,580 injuries, and $2.4 billion in direct property damage each year. Those fires represented about 13% of all home structure fires and 18% of home-fire deaths in that period.
A new dimmer can cure nuisance flicker from a mismatched control. It cannot substitute for checking wiring when symptoms span several fixtures or arrive with heat, noise, or odors.
Local guidance lands in the same place. The Los Angeles Fire Department electrical safety page reports 2023 U.S. national estimates included 23,700 residential fires caused by electrical malfunction, resulting in 305 deaths and 800 injuries, and it advises contacting a qualified electrician for flickering lights. LEDs make these faults easier to spot, since they and their drivers respond almost instantly to changes in electrical current, so a fluctuation that an incandescent bulb smoothed over shows up clearly.
What Happens During the Visit
An electrician works through connections, the breaker panel, service conductors, grounding, and voltage stability under load, and checks neutrals, junction boxes, and circuit loading where the pattern points. Ask for a written quote before work begins, so diagnosis and repair stay as separate decisions.
Ask about capacity too. A home may need an electrical panel upgrade if breakers trip frequently, lights flicker, new appliances are added, or the home still has a 100-amp panel. Our electricians are licensed, and On Time Home Services (ontimehs.com) is one option for electrical troubleshooting and panel work if you're comparing providers.
Send your pattern log with the booking request. Fixture, circuit, timing, appliances, and weather in one short note lets the electrician arrive with the right test gear and start where the evidence points, instead of spending your first paid hour watching a light that won't misbehave on cue.
If your log shows flicker across several rooms, a breaker that keeps tripping, or a panel that can't keep up with new appliances, don't buy another box of bulbs. Our licensed electricians at On Time Home Services handle electrical troubleshooting, wiring repairs, and panel upgrades across the Denver area, so visit On Time Home Services to book an inspection and send your pattern log with the request.
Comments